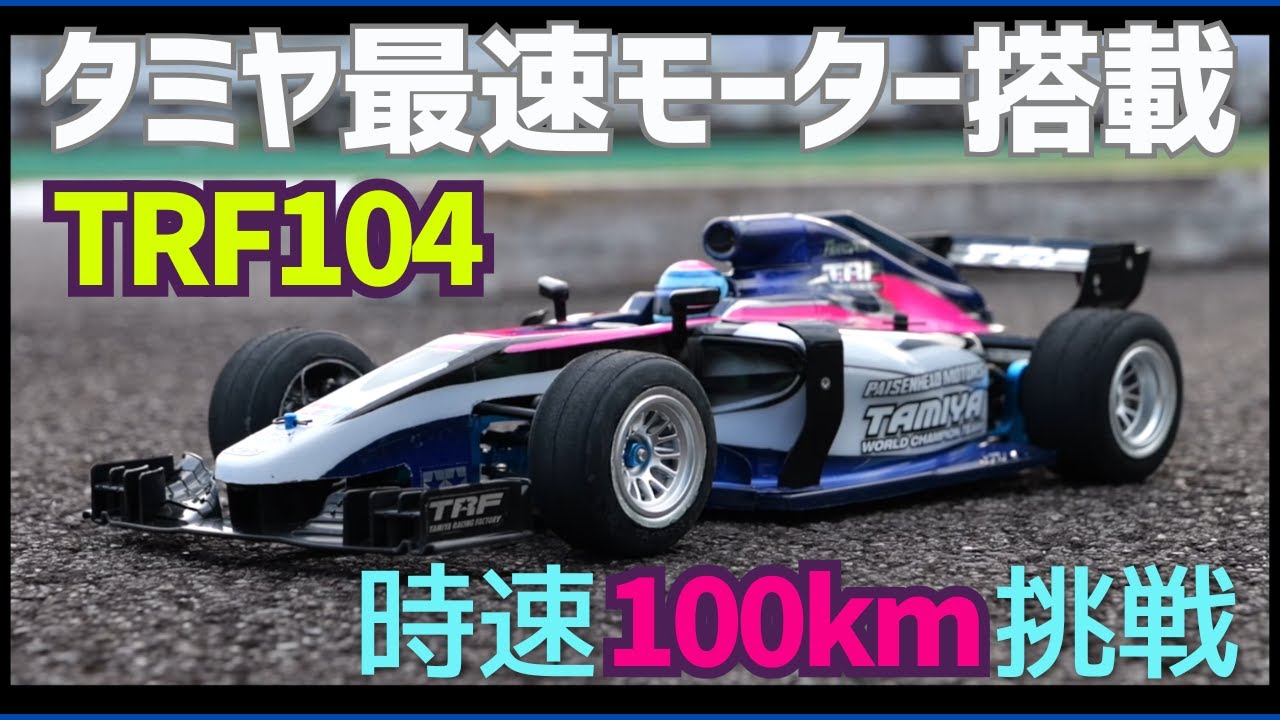
In response to your requests, we installed Tamiya’s fastest motor in the TRF104 and ran it. Please take a look at the video, which also shows off the driving skills of our senior.
Source: Paisen RC
Category Archives: Customized Builds
Paisen RC participating in a radio-controlled car race using the Tamiya Hornet 40th anniversary model Hornet EVO.
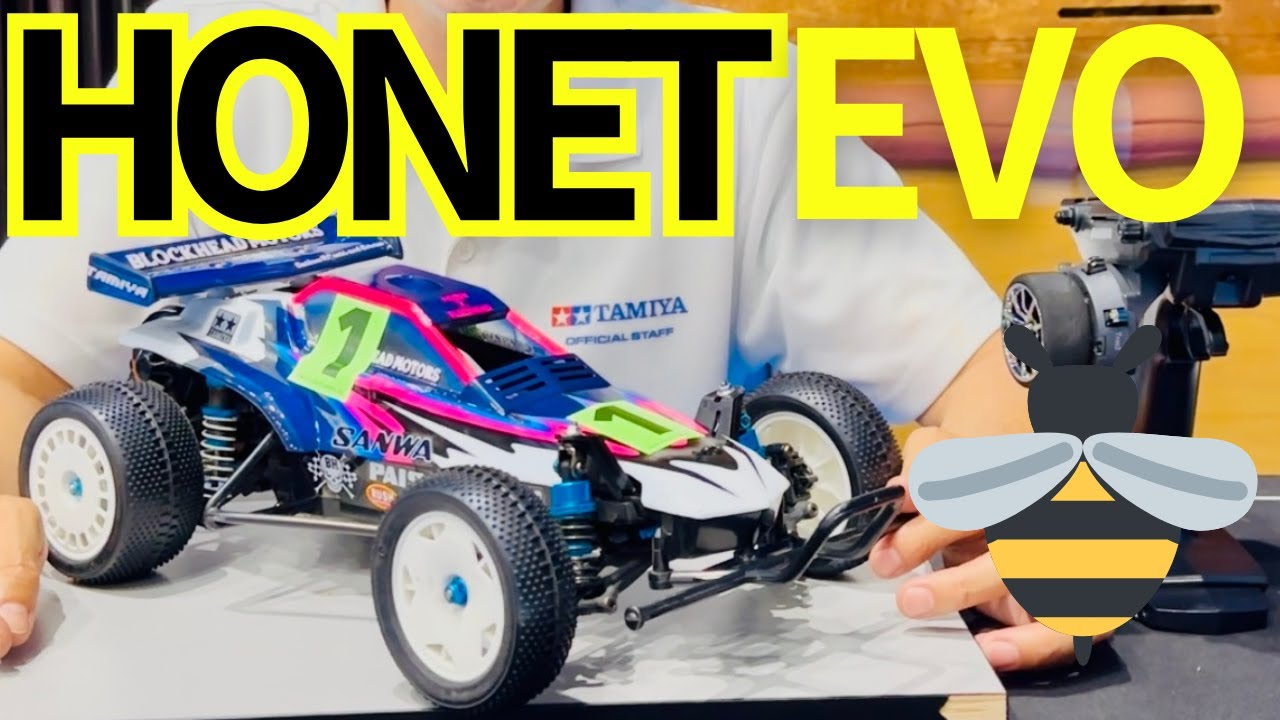
This is a video of participating in a radio-controlled car race using the Tamiya Hornet 40th anniversary model “Hornet EVO”. Please take a look at the Hornet EVO’s magnificent jump.
Source: Paisen RC
Paisen RC (Maezumi Satoshi) tuning of Tamiya 58741 Fighter NXGEN DT-04 chassis to DT-04MS
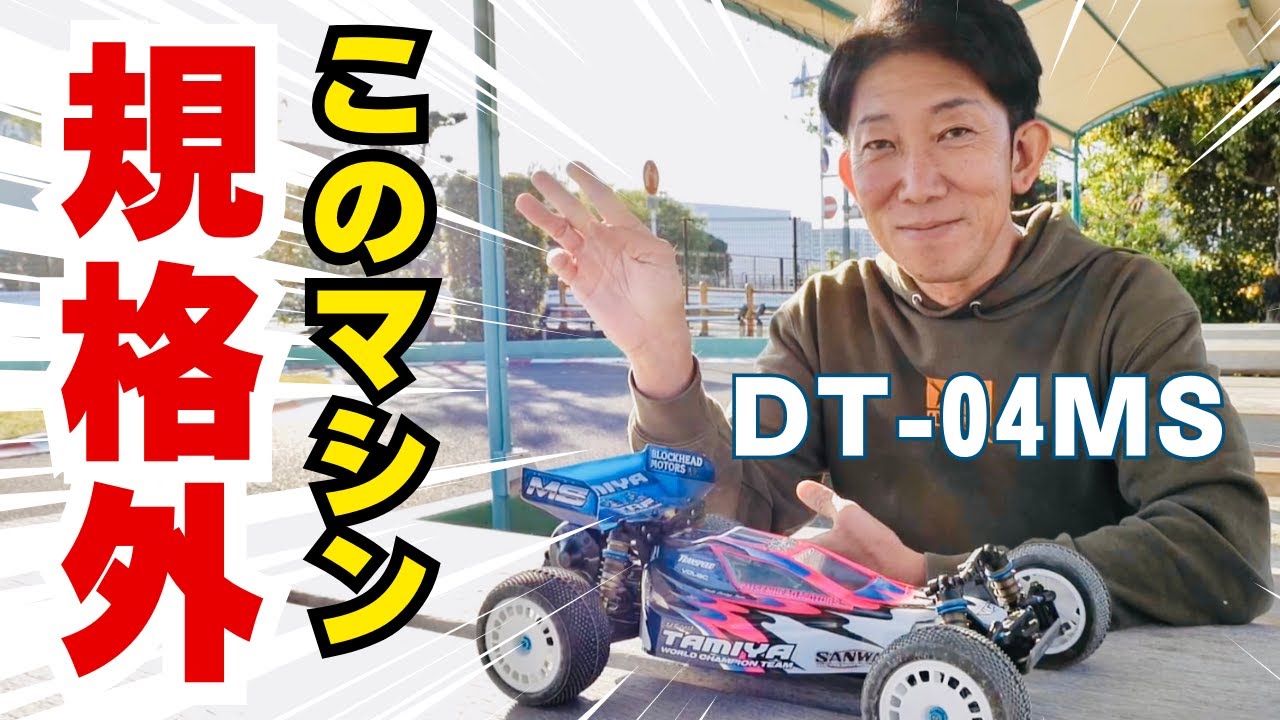
This video is a review of a modified version of the new off-road buggy car “FIGHTER NXGEN” developed for beginners. Compared to the standard version, we also introduce settings that give the chassis performance more suited to advanced drivers, so please take a look.
Source: Paisen RC
TAMIYA XM-01 PRO chassis recommended option parts

Tamiya RC Hornet in a special NANGA color scheme
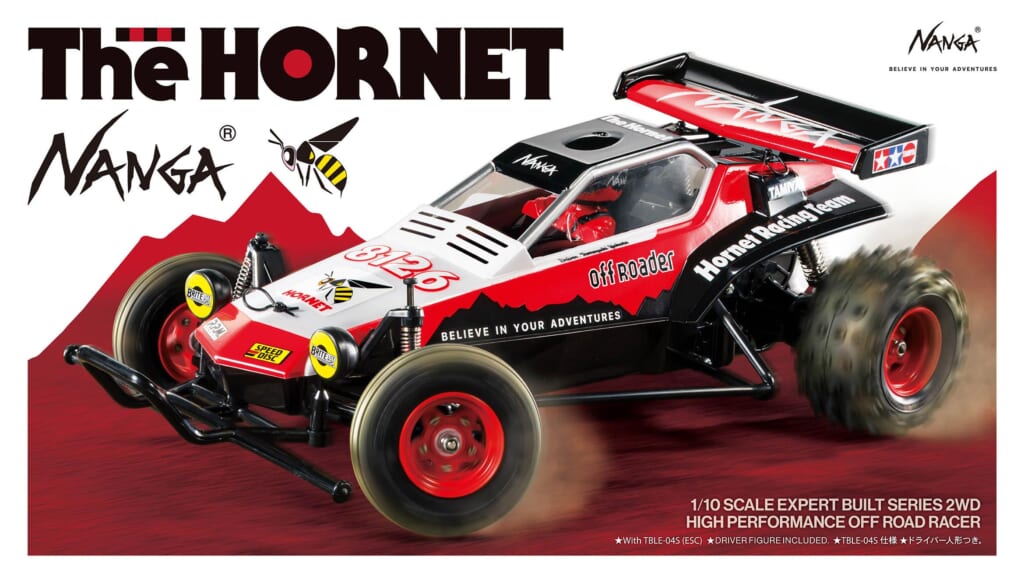
Outdoor brand NANGA has collaborated with comprehensive model manufacturer Tamiya to release a special model based on the electric radio-controlled buggy Hornet.
This model is painted in NANGA’s brand colors of red and black, and the message “BELIEVE IN YOUR ADVENTURES” and the ridgeline of Nanga Parbat are printed on the side. The altitude “8126” is printed on the bonnet, and the NANGA logo is printed on the rear wing. This is a “Running NANGA” specification that combines driving performance and outdoor spirit.
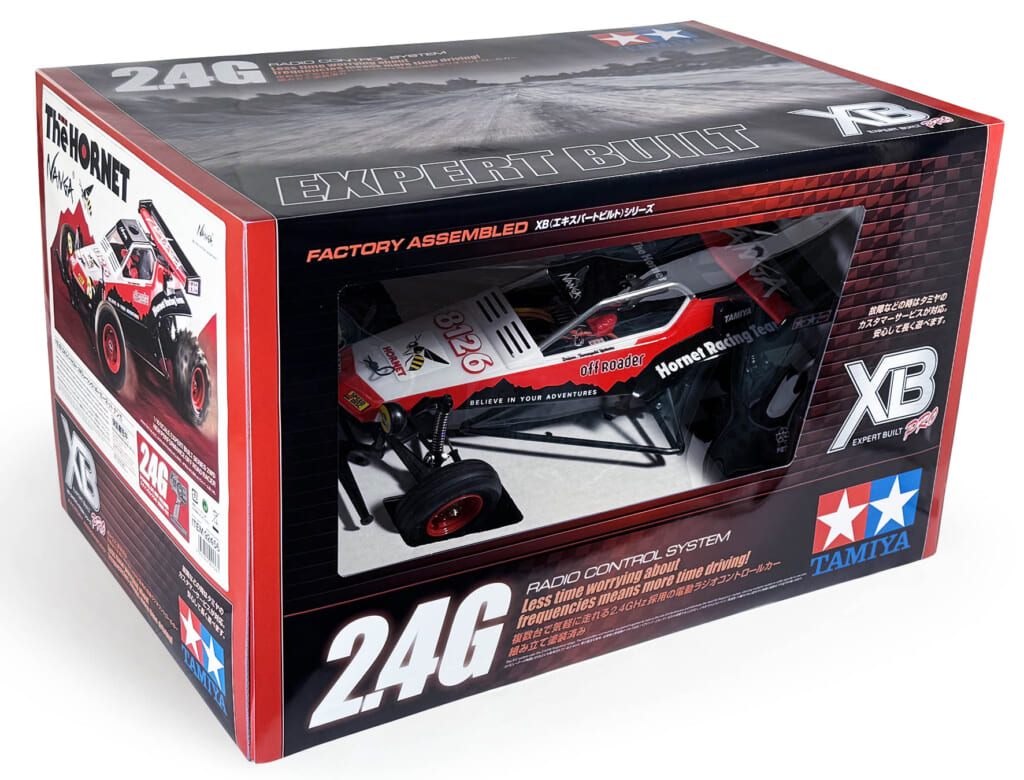
Product name
1/10 XB 2WD Racing Buggy Hornet NANGA
Sales Schedule
・April 11th to 13th, 2025 : Limited quantity pre-sale at GO OUT JAMBOREE
・April 18th, 2025 : Pre-sale at NANGA SHOP YOKOHAMA
・April 25th, 2025 : Pre-sale at NANGA SHOP MARUNOUCHI SHIN MARUNOUCHI BUILDING
・May 2nd, 2025 : Sales start at NANGA ONLINE SHOP and directly managed stores nationwide
This is a new proposal that connects the outdoors and RC hobbies, and it has an appeal that transcends the boundaries of different hobbies.
Source: Nanga
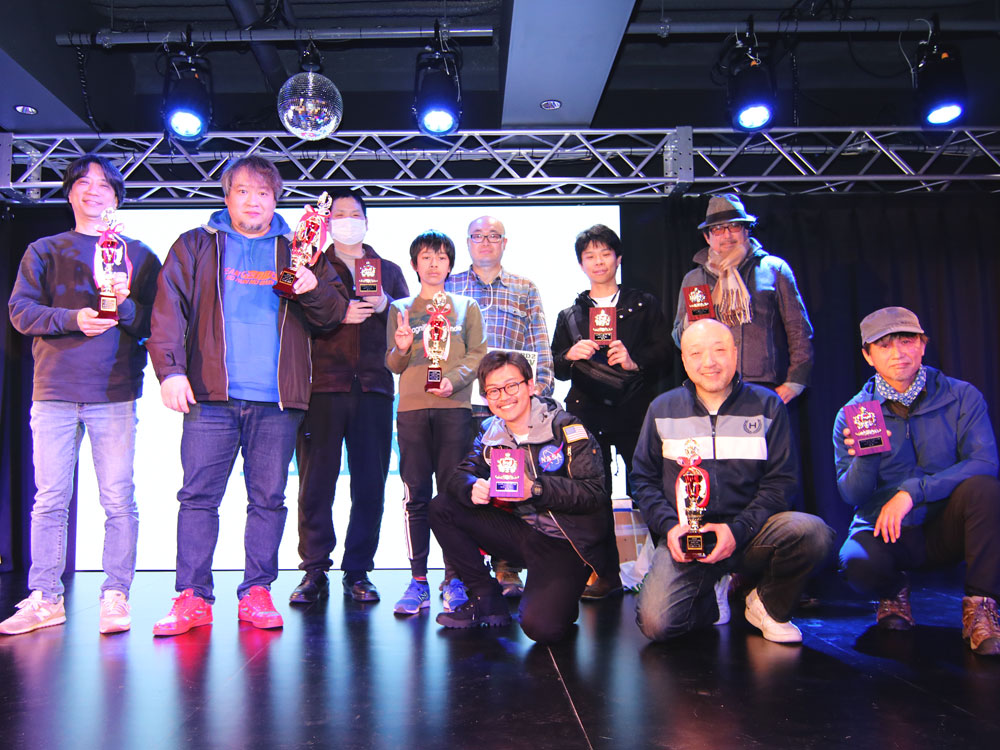
2025 Super Kids Land Main Store Tamiya World Modelers Contest Winners
The Modelers Contest was held for the first time in six years since 2019. Due to the renovation of the venue, Tamiya World, and changes in the environment, it has been difficult to hold events inside the store, but due to the enthusiastic voices calling for the contest to be resumed, it was finally held. 75 works were submitted, and there were familiar faces and many first-time participants, making it a fresh start.
The award ceremony was held in the event hall of Kids Land on the 7th floor of Joshin Nihonbashi store, which opened nearby. Everyone seemed surprised by the solid style of the award ceremony, but they seemed to enjoy listening to the stories about the works. The Kansai Modelers Contest has finally been revived. We are considering making the content more powerful with this opportunity. We look forward to seeing your fun works next time.
Award-winning works
-
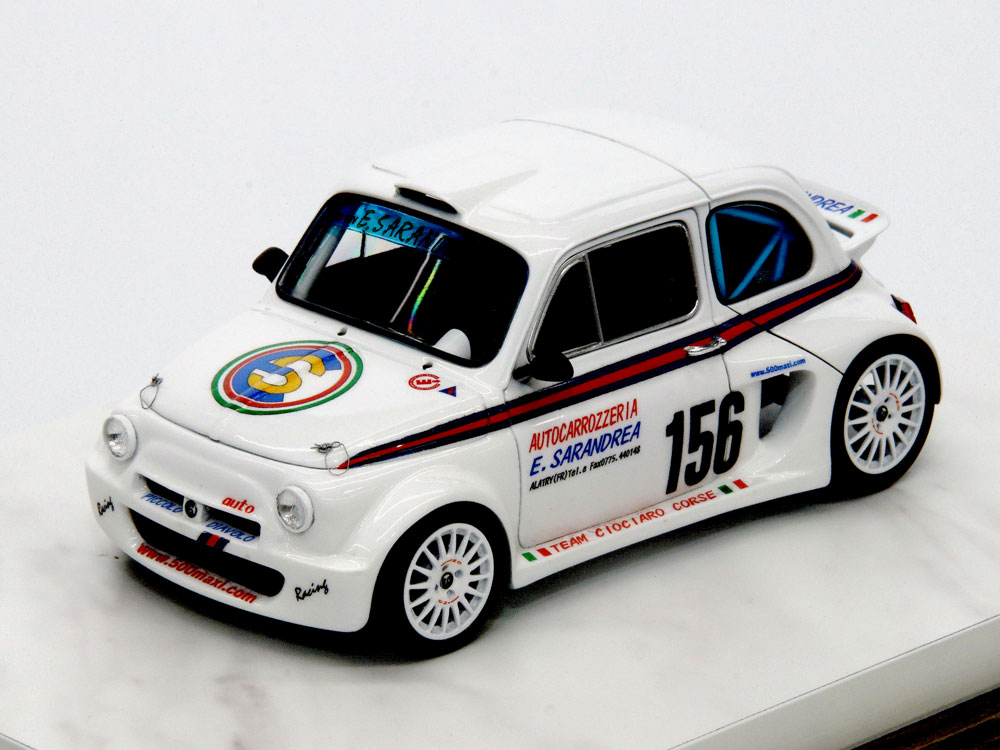
- [Super Kids Land Prize] Creator: build⁺ N-Ta Title: FIAT500 Maxi (1/24) Because it is a popular car model, many people make it, but this is a small but interesting piece that has been carefully crafted in every possible way.
-

- [Tamiya Award Military Category] Artist: Koji Yamada Title: Destroyer Kagero (1/350) Not only has the details on the ship been improved, but since it is a 1/350 full hull model, the key point is to add the water surface to create a realistic scene. It shows a school of tuna swimming under the water, and even the water currents caused by the propellers are depicted when you look down, making this a stunning piece with amazing detailing.
-
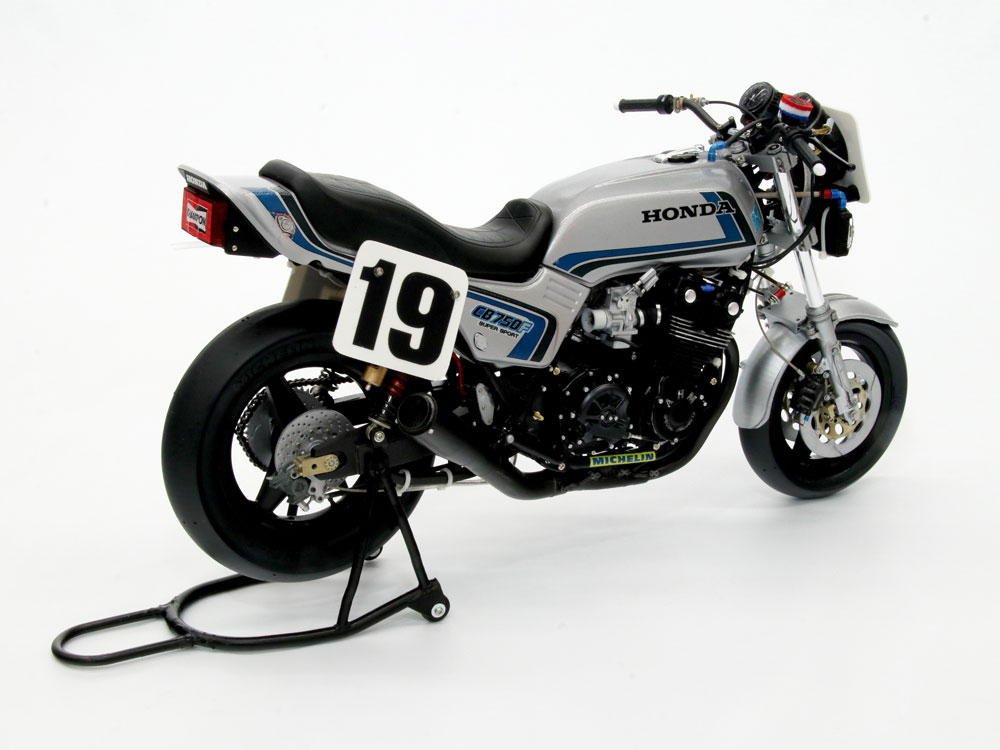
- [Tamiya Award, General Category] Author: Akira Watagawa Title: AHM CB750 F (1/6) Based on a 1/6 big scale Honda CB750F, this is a machine that Freddie Spencer thoroughly crafted for the opening race of the Superbike series in 1982. The shape of each part, the tires, and the added parts were all carefully crafted, and the level of perfection earned it a unanimous award.
-
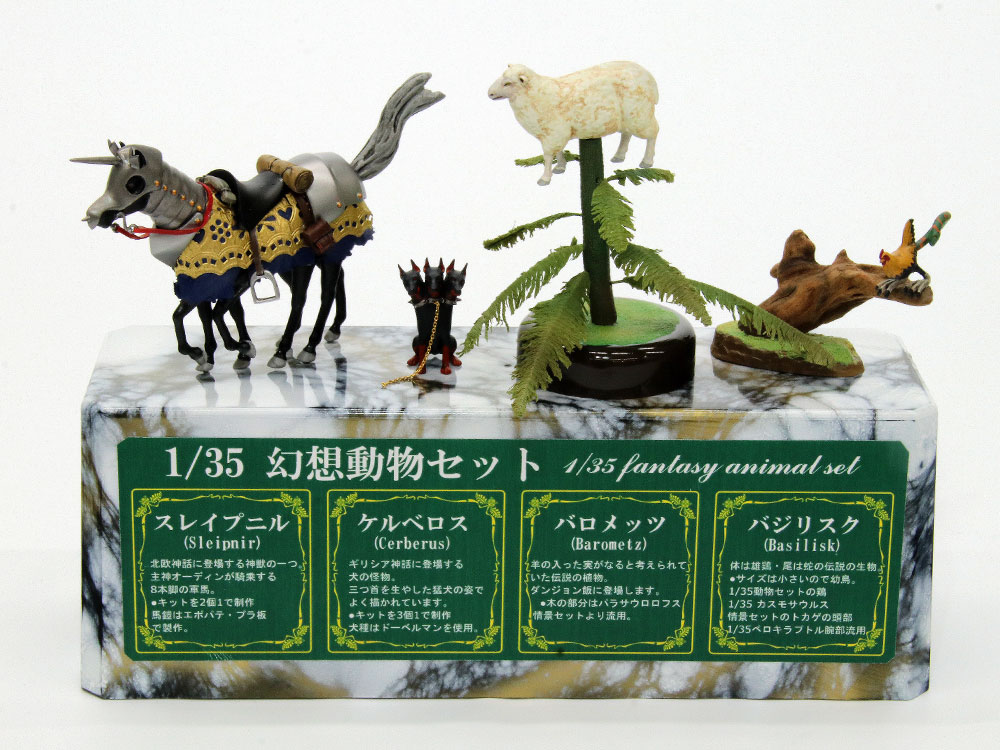
- [Idea Award] Creator: Tsuyoshi Nakazawa Title: Fantasy Animal Set (1/35) Various mythical creatures that appear in Western fantasy works are reproduced in a 1/35 scale animal set. Not only was it surprising to see what they looked like, but the meticulously crafted shapes were a great source of enjoyment for viewers.
-
- Junior Award: Hat Touching (1/48) by Nishiyama, Haruto
-

- Honorable Mention: Velociraptor finds a treat (1/48) Enjoji Bits
-
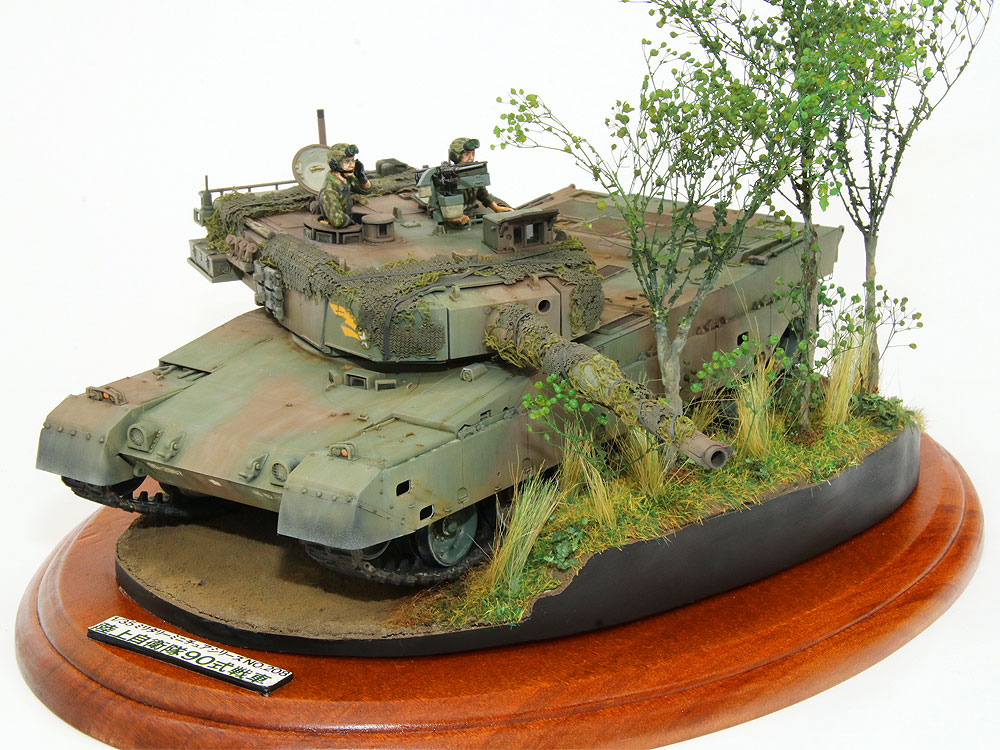
- Honorable Mention: Japan Ground Self-Defense Force Type 90 Tank (1/35) by Takahide Sakagami
-
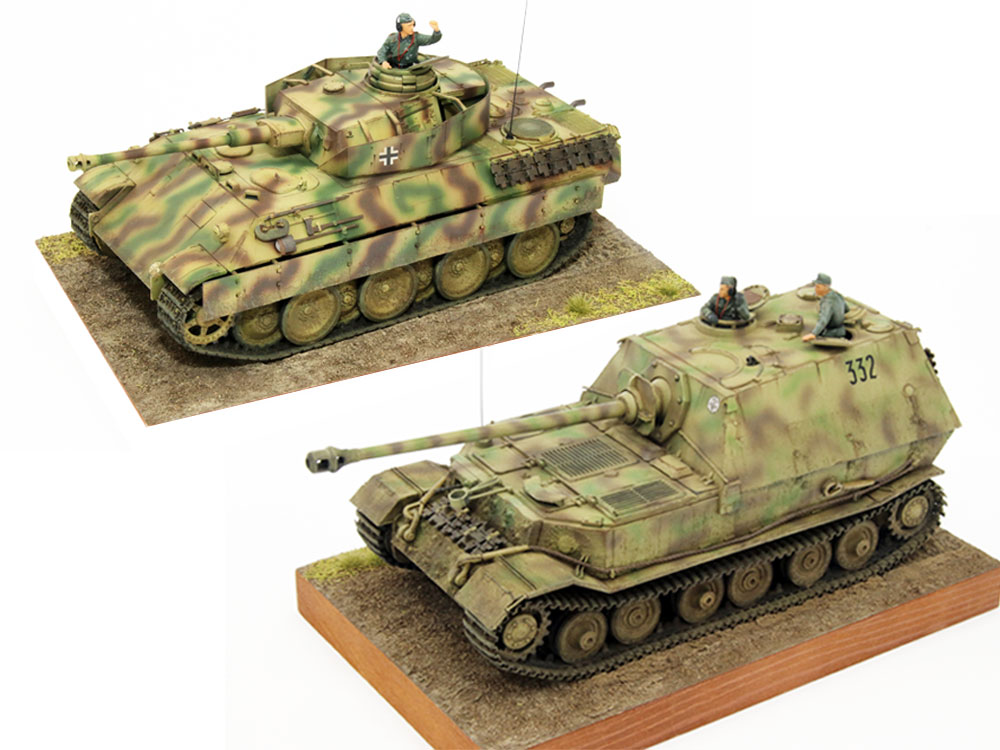
- Honorable Mention: 653rd Heavy Tank Destroyer Battalion (1/35) Sho Yamamoto
-
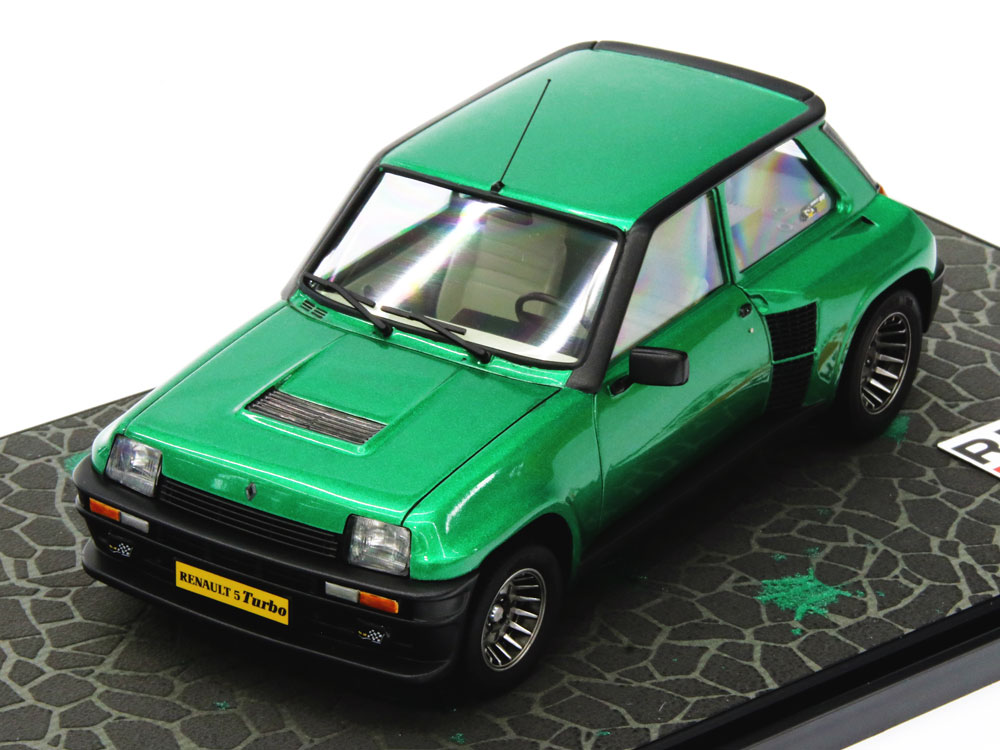
- Honorable Mention: Hot Hatch!! (1/24) Hobizame
-
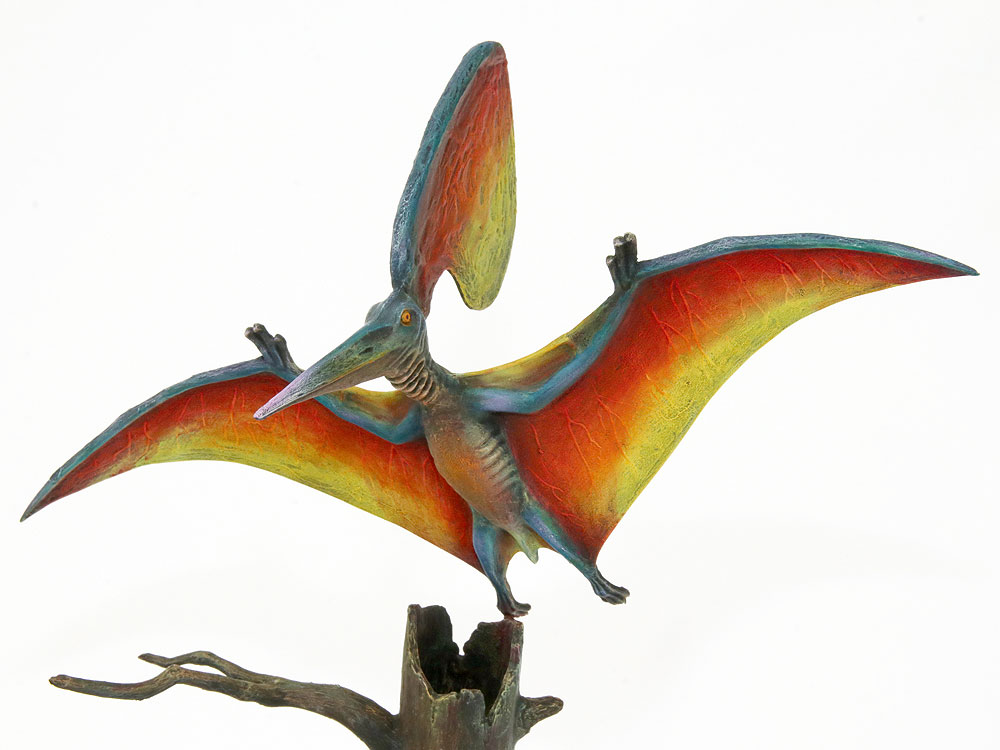
- Honorable Mention: Pteranodon (1/35) by Kiyoshi Otsubo
-
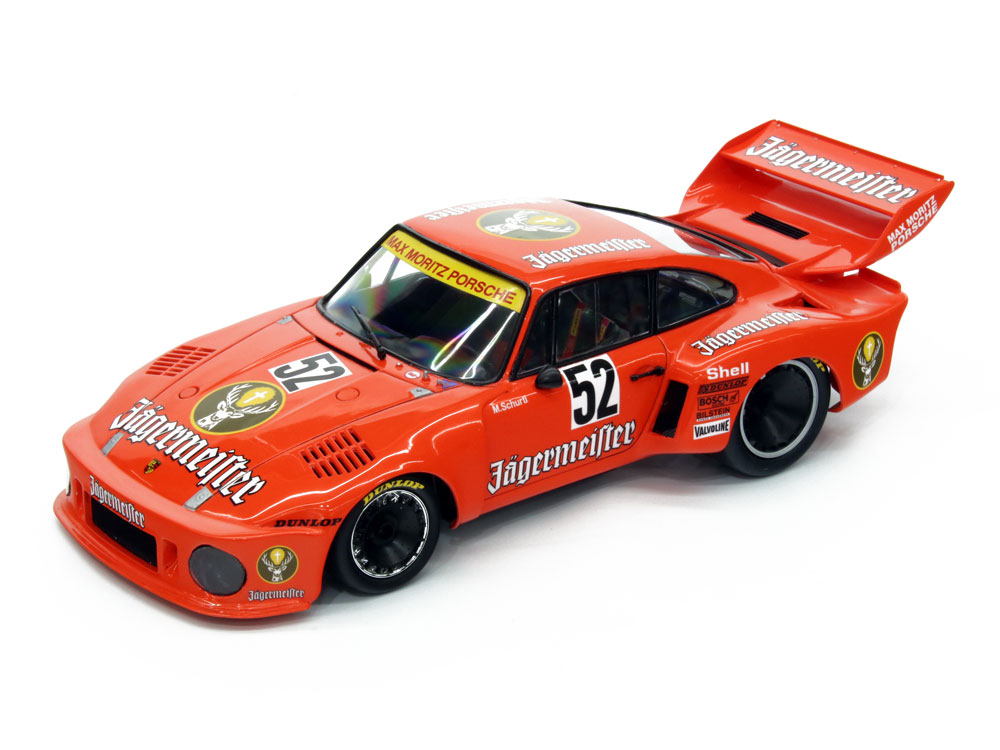
- Honorable Mention: Porsche 935 ZOLDER #52 (1/20) Leg
-
- 2025 Super Kids Land Main Store Tamiya World Modelers Contest Winners
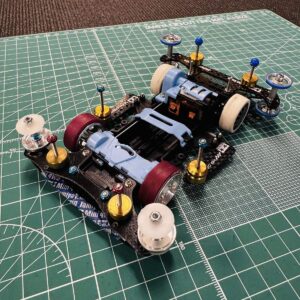
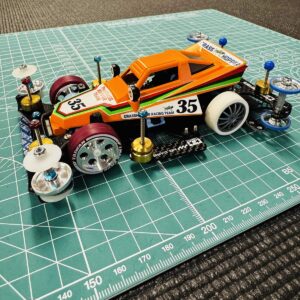
A Tamiya Mini 4WD winning combination in an US advanced class event
Tamiya Mini 4WD cars are easy to assemble, fun, and a great entry point to racing. These small 1/32 scale snap together racers teach hobbyists the fundamentals of chassis balance as they can be set up in numerous ways to traverse different track layouts that are made from plastic.
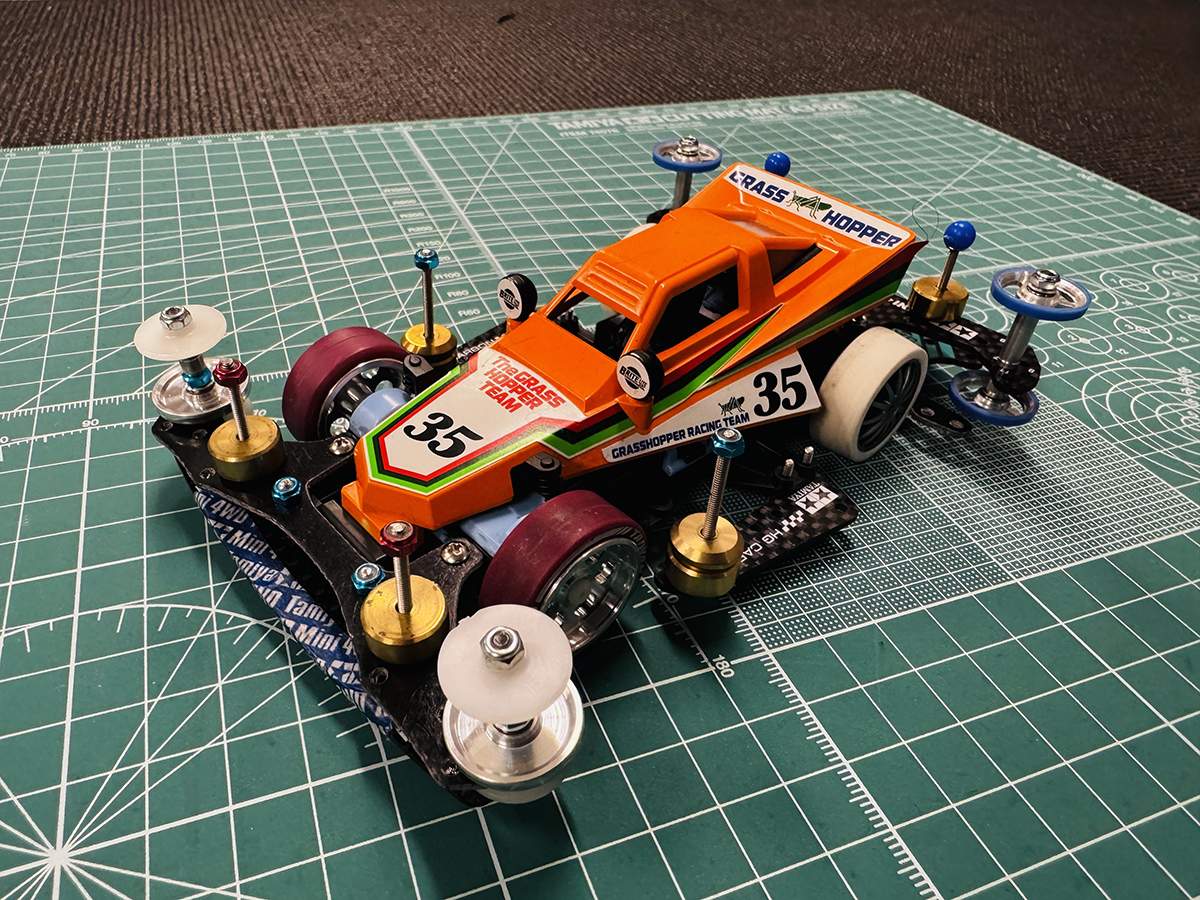
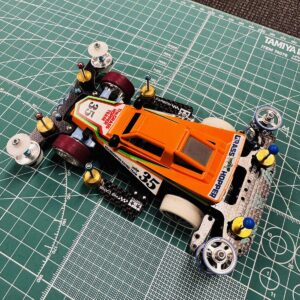
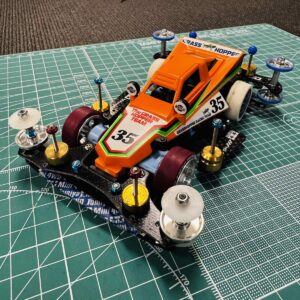
Our customer service supervisor is no stranger to Mini 4WD racing as he has been involved in the hobby for many years. Most recently, he has taken the recent release of “The Grasshopper Jr.” (item 18105) and turned it into a winning race machine that was entered into the ADVANCED CLASS at a local Mini 4WD shop in Fullerton, CA. Dukwho Workshop
ADVANCE CLASS WINNER: Dukwho’s race program features many race class categories for its Thursday Night race program. The class in which Gary took top honors was the ADVANCE CLASS. In that class, racers are allowed to use ANY Tamiya performance part to improve the basic kits performance. There are two things that are not allowed, milling/cutting of the chassis and its attached parts, and “gimmicks”. Gimmicks are things that racers do to existing parts in the quest to get a competitive edge. The “gimmick” typically involves adding modified Tamiya parts to the chassis that were not designed by Tamiya to be used in that way. An example would be making the roller stays flap up and down using springs attached to the main chassis.
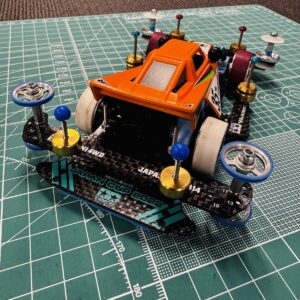
Winning Car Details
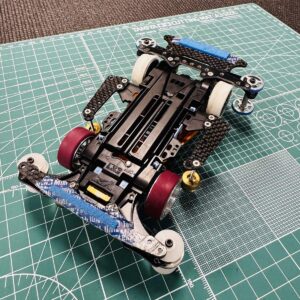
Base Kit: The Grasshopper Jr. (Item 18105) This kit is based on the VZ chassis. The VZ chassis is a compact and lightweight design that features reinforced designs for bumper, rear stay base and more ensuring that it has the durability and flexibility to withstand racing accidents. It is also a rather adaptable unit that lets its owner make numerous updates to the setup. Low friction 620 plastic bearings are molded in POM and maximize drive efficiency, while the chassis and A parts are molded in ABS.
Option Parts The performance parts listed below were used to make The Grasshopper Jr. zip around the track.
Front wheels: JR HG Aluminum Wheels 2pcs for LP Tires II/Reversible (item 95602) Aluminum wheels were used in the front while the rear used plastic wheels. This was done to change the weight balance of the car.
Front Tires: Low Friction Tires-JR Low Friction LP Tire Maroon / 2pcs TMAC 2020 (item 95545)
Rear wheels: Plastic multi-spoke wheels found in various Tamiya base kits.
Rear tires: JR LP Offset Tread Tires Hard/White Low Friction tires have the least amount of traction. Hard tires have the second least amount of traction. By using low friction tires in the front, it allows the car to glide through turns more easily compared to having a grippier tire that can lead to speed loss during turns.
Motor: JR Torque-Tuned 2 Motor (item 15484)
Rear Rollers: 17mm Alum Rollers w/Plastic Rings (item 15449) X4
Rear Roller Stay: JR HG Carbon Wide Rear Plate AR Chassis 1.5mm Asia Chall (item 95653)
Front Rollers: JR HG Alum Ball Race Rollers 17mm Ringless (item 15522)
Front Stabilizer: Item 15391 JR Stabilizer Head Set 11mm, 15mm
Front Roller Stay: The front FRP stay from (item 15526) JR Basic Tune Up Parts Set for VZ Chassis
Mass Dampers Front and Rear: Brass dampers from (item 15514) JR Basic Tune-Up Parts FM-A The brass mass dampers from this set were the perfect weight to use up front, the rear, and the middle of the car. One additional mass damper was used on the left and right middle/front section of the car to add center/front mass damper effect. (Item 15392)
Carbon Side Stays: HG Carbon Side Stays (Item 95601)
Front Brake Stay: JR HG Carbon Reinforcing Plate (Item 95600)
Rear Brake Stay: JR HG Rear Brake Stay 1.5mm
Rear Stabilizer Bar: JR FRP Front Plate (Item 15242)
Brake: JR Brake Sponge Set (Item 15512) This set includes blue brake pads which have the least amount of brake force/friction. The amount of brake friction can be fine-tuned by using Tamiya multi-purpose tape over the brake sponge in sections to reduce brake friction further.
Stabilizer Ball Caps: Stabilizer Ball Cap (Item 95575 ) were used for the rear screws holding the two attached mass dampers.
MISC: JR Countersunk Screw Set (Item 15510) These screws are helpful to use to keep the underside of the car as protrusion free as possible.
This concludes our overview of our resident guru’s Advance Class race winning machine!
See you on track!
Source: Tamiya USA
Video report of Tamiya Blockhead Motors RC Outdoor Festival

TAMIYA BLOCKHEAD MOTORS RC OUTDOOR FES 2024 was held on Saturday, November 30th and Sunday, December 1st, 2024! It was held at Asagiri Camp Base Sorairo, located at the foot of Mt. Fuji in Fujinomiya City, Shizuoka Prefecture, at the “Mattari” site of a large campsite consisting of four free sites. The theme of the festival was “RC x Outdoor x Camp,” where you can enjoy camping and bonfires in the great outdoors. Tamiya and Blockhead Motors are proposing the charm and fun of RC outdoors. There was a wide variety of content for visitors to enjoy with their families and friends, including a “Special Athletic RC Circuit” where visitors could enjoy their own RC or rental machines, an exhibition of a real Monster Beetle, sales of venue-exclusive items from TAMIYA x BLOCKHEAD MOTORS, a Grasshopper & Hornet 40th Anniversary Driving Event, exhibits from popular outdoor brands and shops, RC mini-games and an RC sports day.
★BLOCKHEAD MOTORS
https://blockheadmotors.stores.jp/
★Asagiri Camp Base Sorairo
https://sorairo-camp.jp/
2024 53rd Tamiya Doll Modification Contest Winners Announced
Otani fever at the Paris Olympics. In 2024, sports news set overseas became a hot topic every day. The submitted works included a wide range of masterpieces, including memorable scenes of such athletes. The gold prize in the 53rd contest was an original work by Yuji Aoyama, in which nine colorful Santas came bearing various presents! The natural poses of each doll, as well as the unity and composition of the work that result from them, are superb. You can almost hear the lively voices. The arrangement of the Santas, reminiscent of a German half-track, is also unique to doll modifications based on MM kits. Norio Mushiaki, who won the silver prize , created a look-alike work based on the opening of a drama themed around models. The characters who co-starred with Rico, the main character in each of the three parts of the series, fit well on the runners, and this work is also a clear fusion of the concept of doll modifications based on plastic models. Many people enjoy this contest by reminiscing about historical figures. Jun Ogura created a three-dimensional figure of Yoshisada Nitta, a warlord from the Muromachi period. This work won the bronze award for carefully recreating the costumes, weapons, and accessories in detail using multiple materials. The results of the artist’s research into the subject matter are evident. This work by Shinshiro Asagi captures a scene from the remarkable performance of Otani, a hot topic in 2024, after he transferred to a new team . Although the base space is less than 5 cm square, the dynamism of his speedy base running is a sight to behold. Meanwhile, Yoshiaki Maruno ‘s Otani is smiling and relaxed. However, the main character is probably the forehead flick that made the opening pitch a great success. In the entertainment world, the movie “Godzilla-1.0” winning the Academy Award for Best Visual Effects was also big news. Shota Namikawa recreated the joyous expression of Director Yamazaki . I think that subjects that emphasize newsworthiness often require production in a short period of time, but each work is carefully and carefully finished. The above three people won the Topical Award. Hiroyuki Kimura ‘s work, which won the MM Award, is excellent in the sense of unity between the soldier and the war horse, and the sense of sprinting. The flow of the mane and tail is also carefully considered. With the addition of the 1/35 Animal Set II to the MM series, more and more people are incorporating this into their work. The Newcomer Award went to Junichi Sato, who tried his hand at this year’s challenge, for his Raid on the Ako Roshi. The base of the modification is a fighting soldier doll, but it is interesting how the same battle can have a completely different impression depending on the costume and style. The Idea Award went to 78-year-old Kunihiko Sato, who participated with a highly skilled work in which he modified a doll into a naked body and then painted it with animal paint . The vivid coloring is impressive, and the three-dimensional letters on the base, which are unique to Sato’s works, are still alive and well. It was unfortunate that there were no works that were eligible for the Junior Award this time, but looking at the submitted works, it seems that there are still many ideas that will make you think, “Oh, I could have done that!” Even if you are trying it for the first time, don’t think too hard, why not start by rearranging the limbs and face.

[Gold Award]
[Artist] Yuji Aoyama (50), Aichi
[Title] Model Sentai Santa Clauses The Santa
Clauses are a group of Santas who specialize in models, formed for model-loving children around the world. They were made in the image of Sentai, with RC blue, military red, and marine yellow. Some of the Santas have already assembled the kits, but that’s just part of their charm. The reindeer are modified horse kits, and the presents, such as RC and plastic models, are made from plastic sheet metal and putty. I ran two thick wires from the base to the sled, but had a hard time getting them into the thin reindeer’s feet. Santa, please bring dreams to these talented modelers of the future!
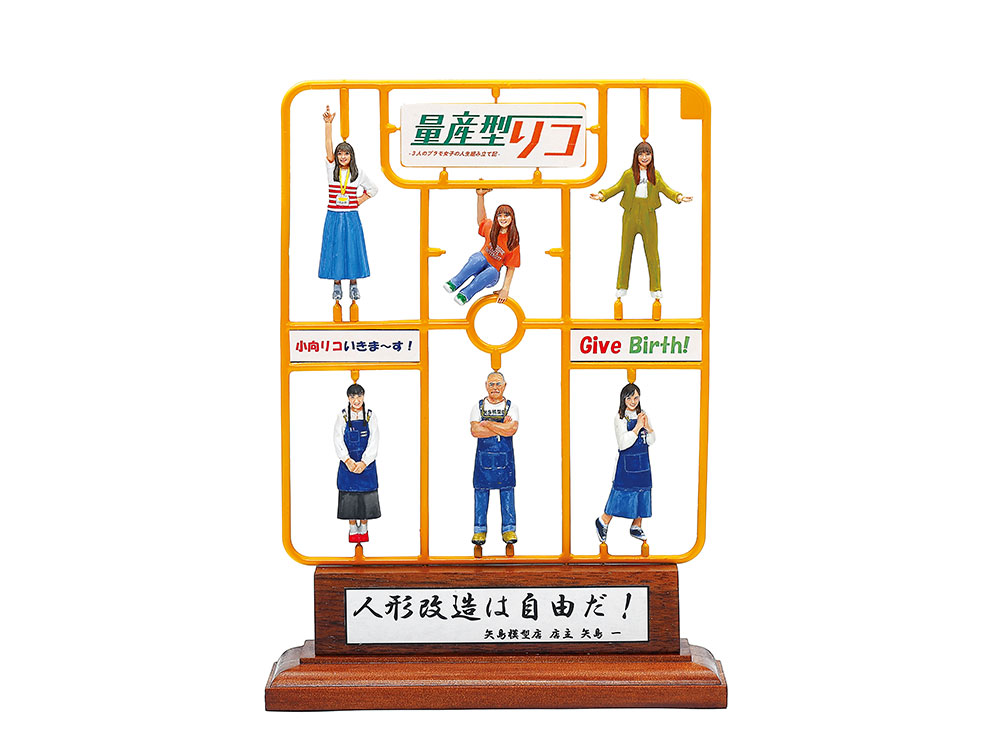
[Silver Award]
[Author] Norio Mushiaki (57) Okayama
[Title] Mass-Produced Rico – The Life Assembly Diary of Three Plastic Model Girls
This is the third and final installment of the “Mass-Produced Rico” series, a full-scale drama themed around models, and as a modeler I wanted to leave a mark on it, so I chose it as the theme for this episode. The three Ricos and the members of the Yajima Model Shop are all unique and attractive characters. I enjoyed making them while watching the drama many times so that I could express each of their characteristics well. You can use your imagination to create an original work, or you can make a look-alike of a celebrity or a sports player. The best part of a doll modification contest is being able to make whatever you want. So, a final word: “Doll modification is free!”
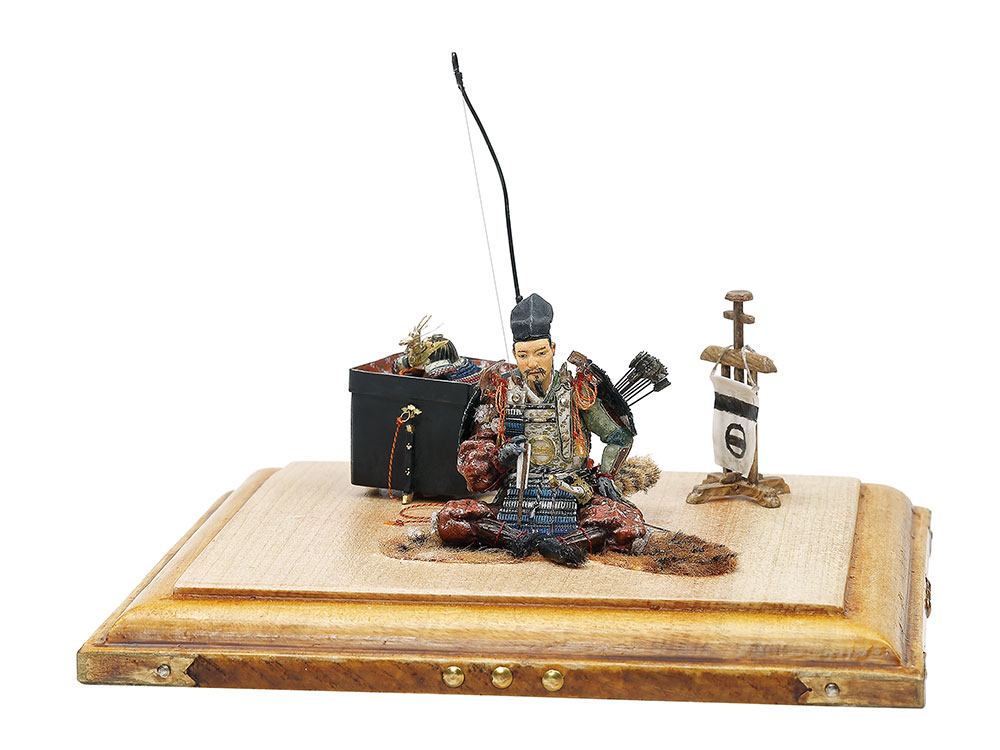
[Bronze Award]
[Artist] Jun Ogasawara (46) Chiba
[Title] Yoshisada Nitta
This was made based on the portrait of Yoshisada Nitta, owned by Fujishima Shrine in Fukui City. I started making this casually, but I had trouble trying to make it exactly like the original, and I ran into problems like “the armor is different from what I know” and “I don’t really understand the vertical pattern.” In the end, I decided to make it how I wanted while respecting the original as much as possible. I placed importance on texture, making hair bundles for the fur parts and planting them in putty, and also incorporated wool felt. I think I was able to achieve a more precise finish by using brass wire and brass foil. I tried incorporating the design of an important cultural property from the Muromachi period into the pedestal.
Click here for the brochure of all entries from the 53rd Doll Modification Contest
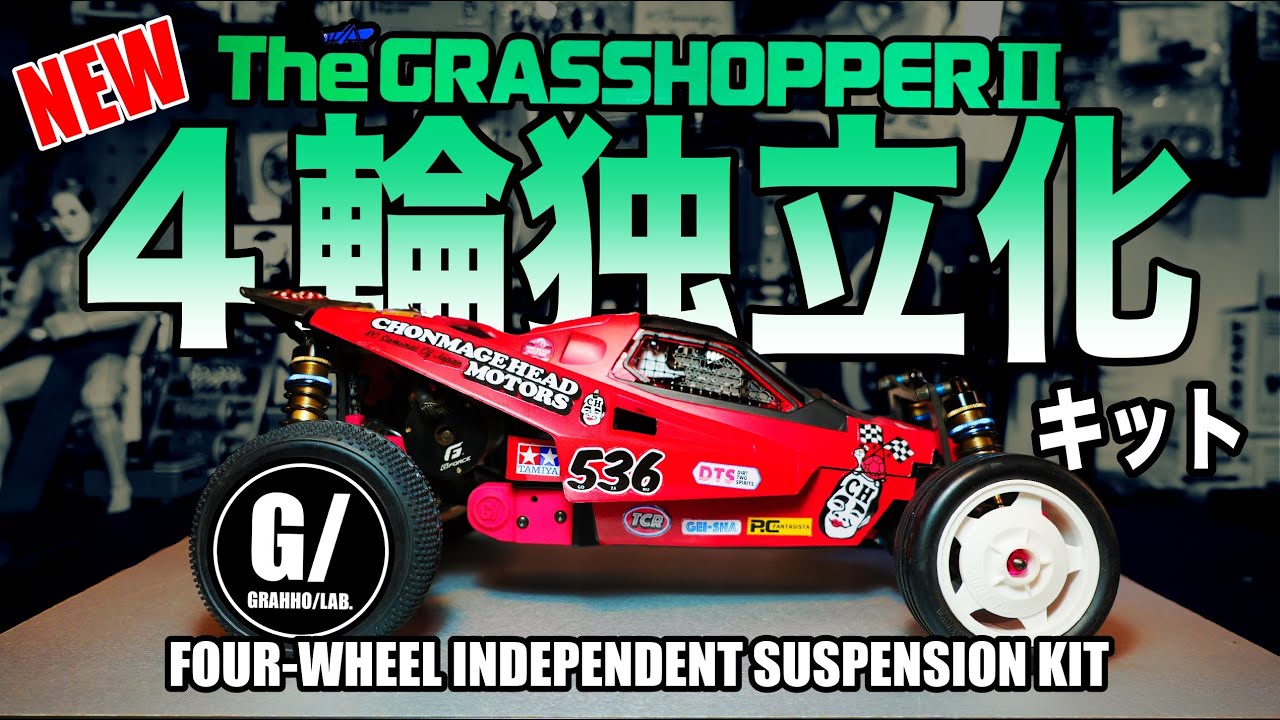
Tamiya Grasshopper II four-wheel independent suspension kit is now on sale by Grahoo/Lab
■List of parts required other than the kit to purchase:
https://teamchonmage.com/gh2parts/
■Explanation of this video In December 2024, the original Tamiya will release a four-wheel independent chassis for the Hornet EVO, which is causing a stir. GRAHHO/LAB. is an indie manufacturer known only to those in the know, which develops and sells a high-quality kit that allows you to easily convert the Grasshopper into four independent wheels. This time, what a surprise! GRAHHO/LAB. has launched a new kit that allows the Grasshopper II, which has many die-hard fans, to have four independent wheels, and here is a video that thoroughly introduces it.
■CONTENTS
00:00 Opening
02:16 Points of evolution
07:09 Introduction to the basic pack
07:51 Introduction to optional parts
08:55 Parts required other than the kit
11:02 Areas that require modification
13:35 Assembly summary
15:10 Release date and price
Source of video: TEAMCHONMAGE