The 82nd AFV model photo contest “Pachi”. People of all ages applied, from the youngest 10 years old to the oldest 80 years old. This time, there were many people who narrowed down to one work that “this is it”, and I felt the enthusiasm for that one. In addition, among the junior award-winning works, there were some masterpieces of a high level that were no different from those of the general public. Compared to previous years when there were many entries in the photography category, the number of entries in the scenery category increased this year. The vehicles that became the subject were mainly the M18 Hellcat and KV-2 released this spring, and many works using these were received.
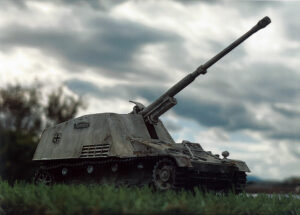
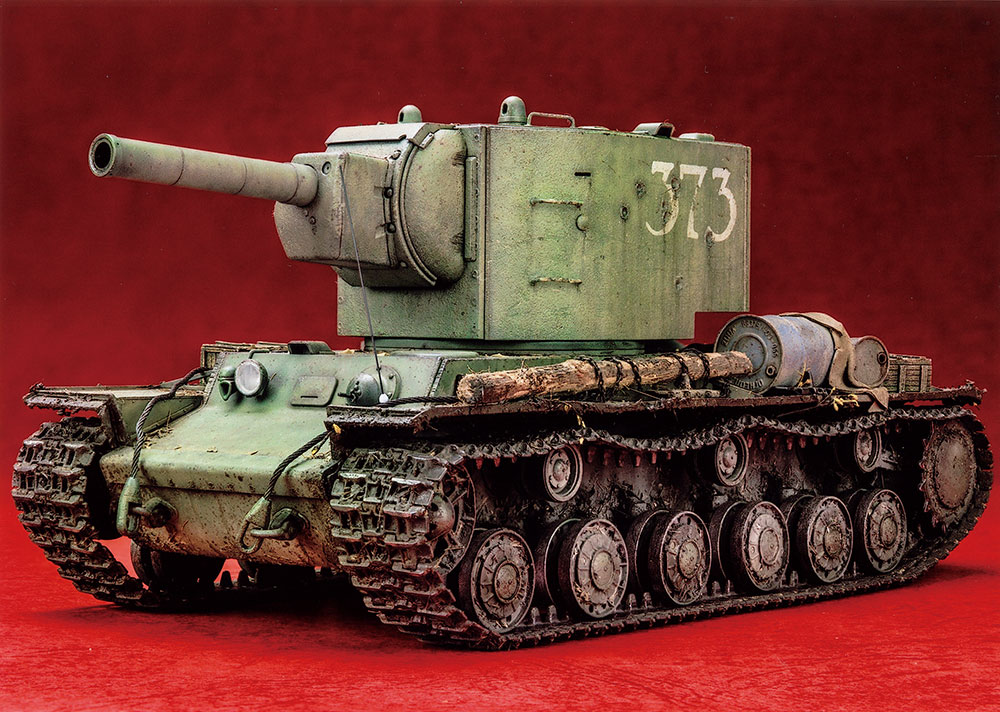
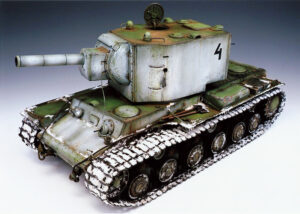
Mr. Mitsuishi’s work, which won the gold prize in the landscape photography category, makes excellent use of the twilight sky in the background, and the scene combining vehicles and soldiers visible in the backlight is splendid. Mr. Minami’s KV-2, which won the gold prize in the photography category, has a realistic and solid green body with a complementary red background, giving it an impressive finish.
The deadline for applications for the Pachi Contest is September 1 every year. When the model is completed, next is a snap with the camera. We are waiting for one piece of the entrance.
Prize-winning works in the landscape photography category
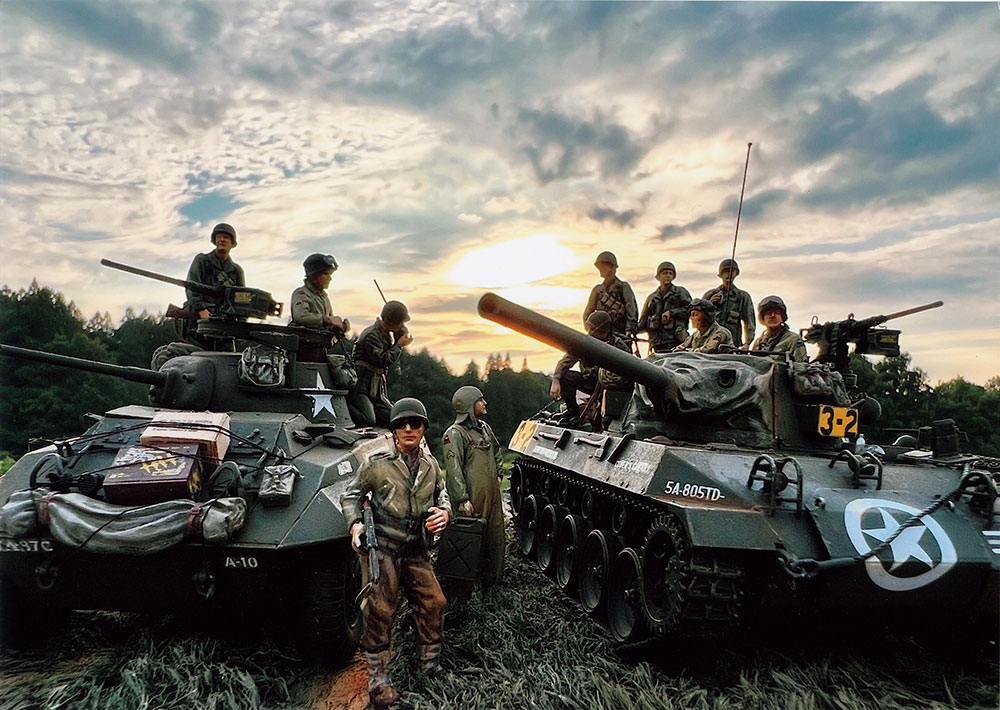
Gold medal
[Author] Kunihiro Mitsuishi (56) Oita [Title] Twilight [Scale] 1/35
This is a diorama using the M18 Hellcat and American soldier figure released this year, and my favorite greyhound. I assembled the set outdoors at dusk and pressed the shutter while being conscious of the ever-changing background. I deliberately chose an image that emphasized the silhouette with a hint of backlight. It is a privilege of the countryside to be able to shoot in a beautiful location of the setting sun. (smile)
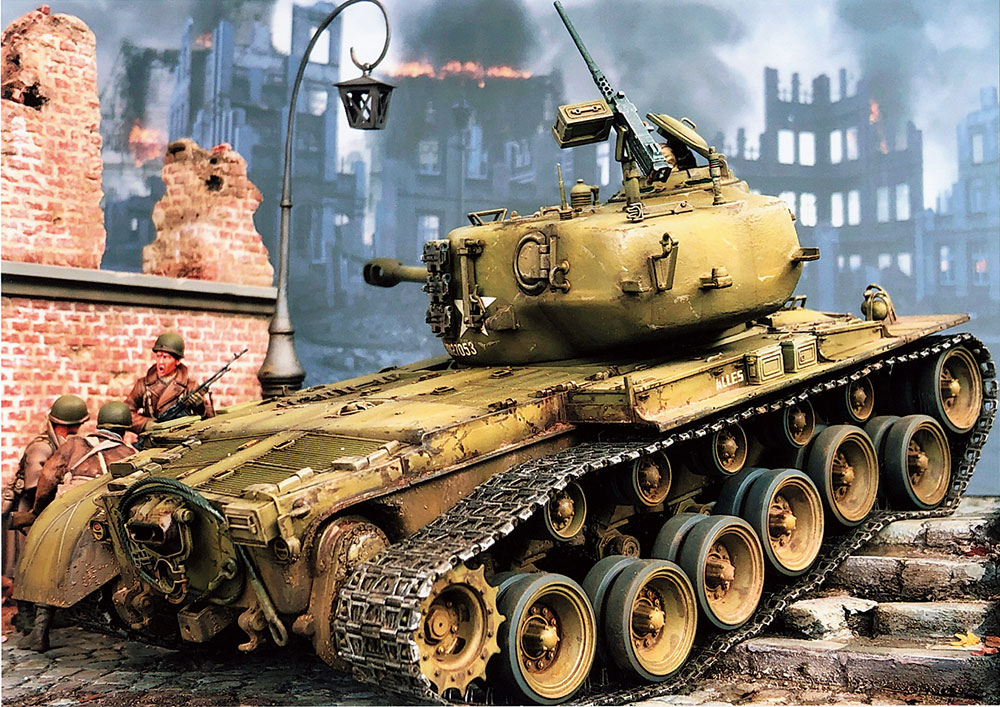
Silver Award
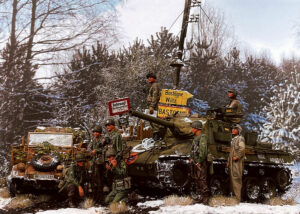
[Author] Kenichi Sanada (51) Fukuoka [Title] Strike to Victory [Scale] 1/35
This work was created with the theme of a scenery work that makes use of Pershing’s movable suspension. Some fenders have been removed to emphasize the series of movements going up the stone steps. The base stone steps and brick wall are made by myself from styrene boards. Making a diorama is hard work to give shape to your imagination, but nothing can replace the joy of completing it.
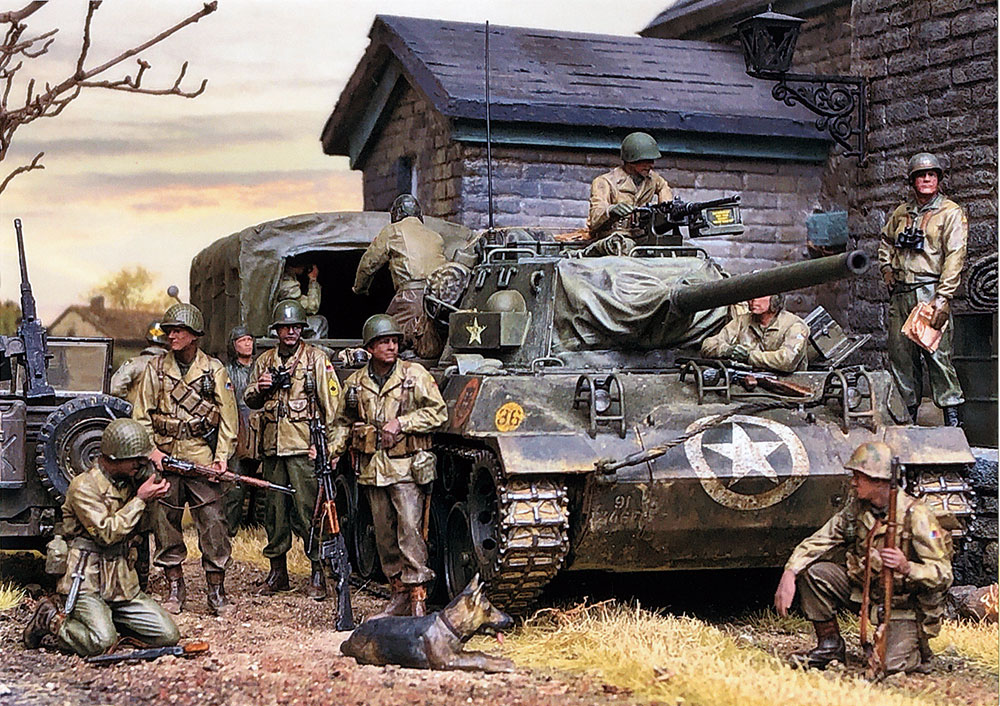
Silver Award
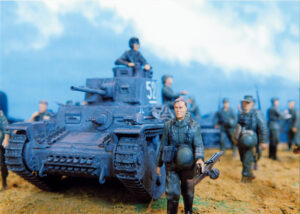
[Author] Akira Hitomi (58) Tochigi [Title] To a new mission [Scale] 1/35
The work depicts a scene in which a new mission was announced over the radio just after an American military reconnaissance unit joined the platoon. It is a combination of M18 Hellcat, cargo truck, jeep and infantry. Other materials used are styrene board for the building and tissue paper for the track holo. The photo was taken outdoors in the evening. For me, Pachi is the pursuit of the ultimate reality.
-
-
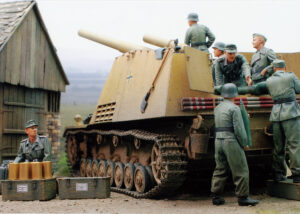
[Bronze Award] [Author] Tomoya Kawata (24) Yamanashi [Title] Preparation for bombardment [Scale] 1/35
-
-
[Bronze Award] [Author] Takahiro Tani (41) Osaka [Title] Seeing a distant hometown [Scale] 1/48
-

-
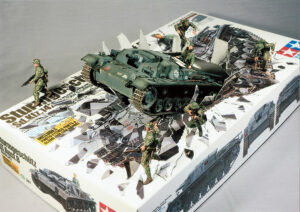
[Bronze Award] [Author] Yusuke Hayashi (42) Tokyo [Title] SHERMAN IN ACTION [Scale] 1/35
-
-
[Bronze Award] [Author] Hiroshi Takashima (60) Tokyo [Title] Frontline reconnaissance [Scale] 1/35
-
-
[Junior Award] [Author] Yuya Kato (13) Miyagi [Title] Peace Treaty Established, Return to the Original Corps [Scale] 1/48
-
-
[Junior Award] [Author] Ibuki Sawamura (14) Tokyo [Title] Shade of trees [Scale] 1/35
-
-
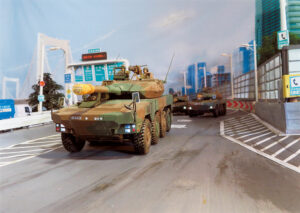
[Special Award] [Author] Iwao Hashimoto (80) Chiba [Title] Type 16 Going on the Metropolitan Expressway [Scale] 1/35, 1/48
Prize-winning work in the photo category
Gold medal
[Author] Kentaro Minami (31) Shizuoka [Title] KV-2 [Scale] 1/35
For painting, I used an airbrush with a diameter of 0.2 mm, sprayed green in a mottled manner, and added buff little by little to increase the brightness. I made my own masking on the turret with a cutting plotter and applied imaginary markings. For the background, choose red, which is the complementary color of green. At the same time as making the tank stand out, it also expresses the Soviet tank-likeness. I had a hard time shooting without red being reflected on the car body.
Silver Award
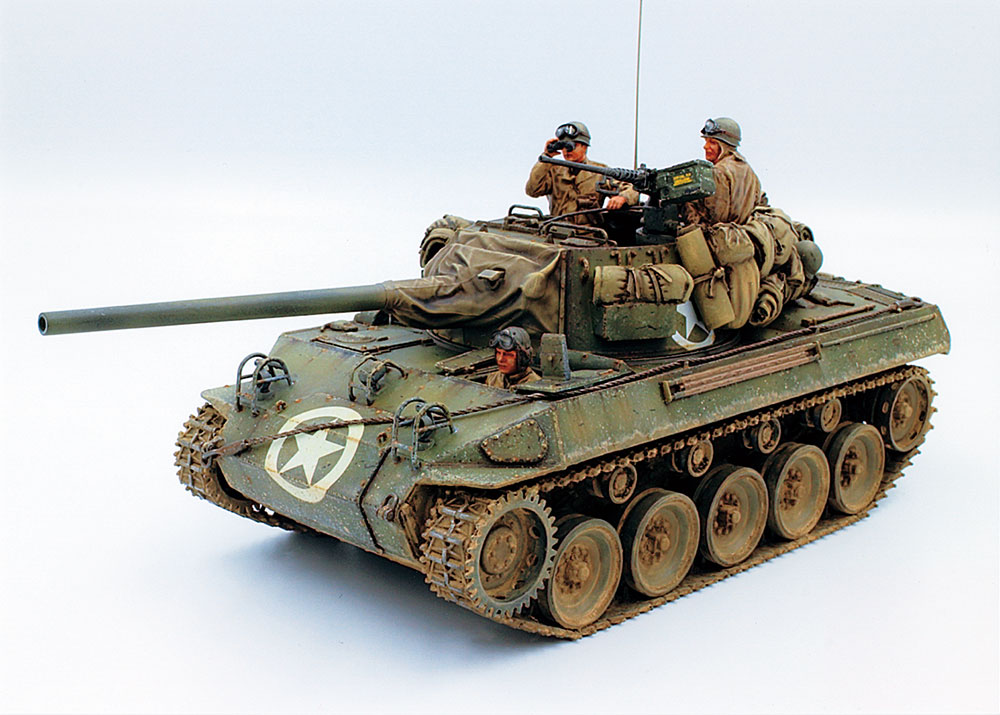
[Author] Yoshiyuki Kano (50) Hokkaido [Title] American Tank Destroyer M18 Hellcat [Scale] 1/35
Since it is a monochromatic tank, I focused on painting. Crafts add dolls and luggage. The painting was finished with chipping, dry brushing, filtering, etc. so that it would not be monotonous. The undercarriage is soiled with a weathering stick, etc., and then sputtered. I used a mirrorless single-lens reflex camera and took pictures indoors using a shooting box.
Silver Award
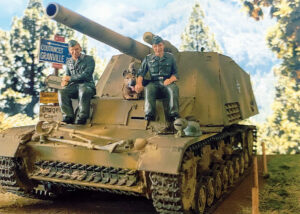
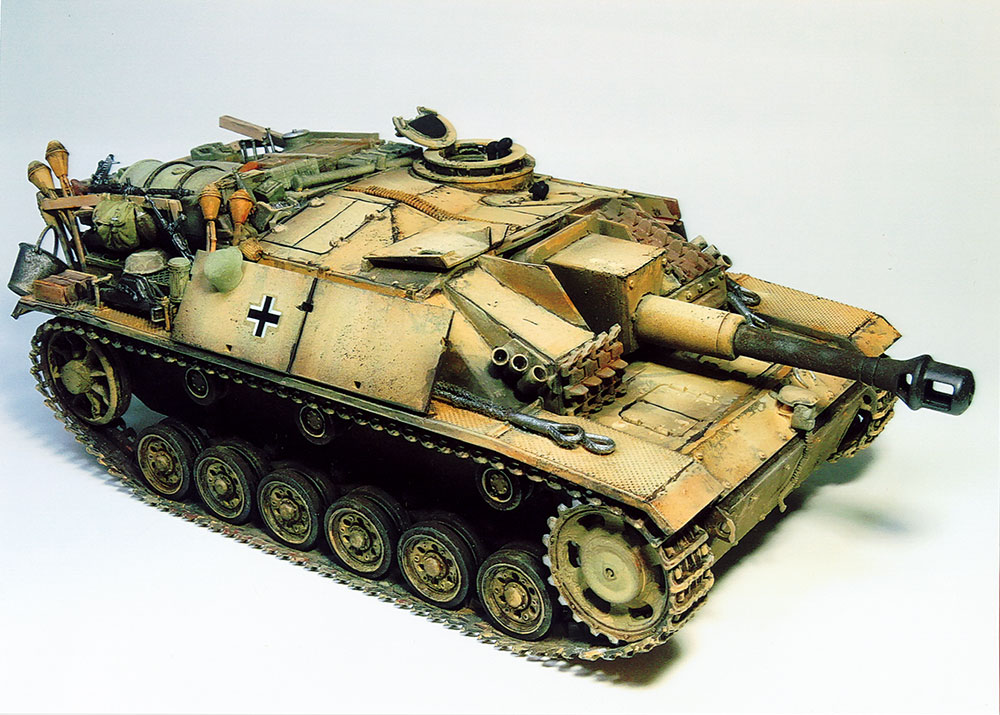
[Author] Satoshi Tateoka (60) Chiba [Title] Type III Assault Gun G [Scale] 1/35
I made it with the image of a vehicle full of spare supplies in the latter half of the war. The kit is a straight assembly with additional armor plates and rear racks. Equipment is a diversion from other kits. The painting uses a combination of lacquer, acrylic and enamel paint. I paid attention to the painting so that I could feel the three-dimensional effect as a whole, being conscious of the sharpness of the light and shade and the color tone.
-
-
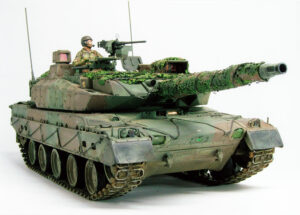
[Bronze Award] [Author] Ryoichi Sumida (64) Fukuoka [Title] Type 10 Tank [Scale] 1/35
-
-
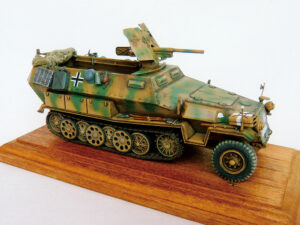
[Bronze Award] [Author] Nobuyuki Nippashi (58) Tokyo [Title] Sd.Kfz.251/10 (1943) [Scale] 1/35
-
-
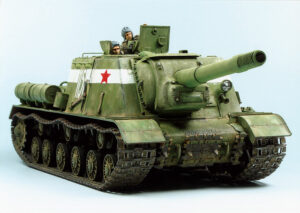
[Bronze Award] [Author] Ryuji Nozawa (67) Saitama [Title] Heavy self-propelled artillery JSU-152 [Scale] 1/35
-
-
[Bronze Award] [Author] Yosuke Yamada (58) Hyogo [Title] KV-2 “GIGANT” [Scale] 1/35
-
-
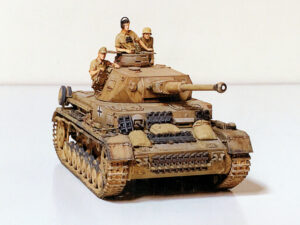
[Junior Award] [Author] Yuki Nishimura (15) Kumamoto [Title] Panzer IV G Type Initial Production Vehicle [Scale] 1/35
-
-
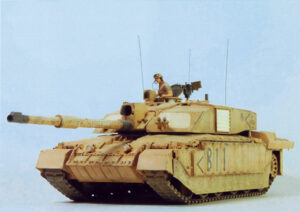
[Junior Award] [Author] Garyu Mori (14) Kagawa [Title] Challenger 2 [Scale] 1/48
-
-
[Special Award] [Author] Takanori Shigeoka (57) Fukuoka [Title] Attacke!! [Scale] 1/35
Past years prize-winning works